Paint
Like a Pro
Part Five: Enhancing Different Surfaces
By Mike McVey
![]()
|
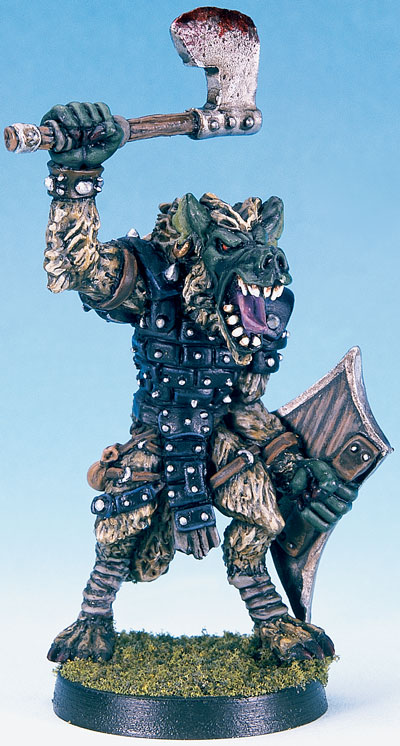
The
fur on this gnoll was built up with successively lighter drybrushes
to pick up the texture sculpted onto the miniature.
|
 |
In the previous article of this series, we started to look at highlighting and shading: techniques that add depth and realism to your miniatures. These techniques work by exaggerating the lighting effects on the surface of a miniature, so higher surfaces that would naturally catch the light are painted in a lighter tone, and the areas that would be in shadow are painted in a deeper tones. We discussed these methods in general terms last month, but now we're going to examine how to apply them to specific areas and types of surface found on your miniatures.
When miniatures are sculpted, a great deal of thought goes into how each of the different parts of the model will be represented -- for example, the fur of a gnoll will have a far heavier texture than the hide of an ogre. When you first examine a miniature, all these different surfaces and textures may seem a little daunting. But in fact, by using certain techniques, you can turn them to your advantage and produce some really great effects quickly and easily. Drybrushing and washing are two such processes; they work especially well on heavily textures surfaces such as fur and chainmail.
Drybrushing
|
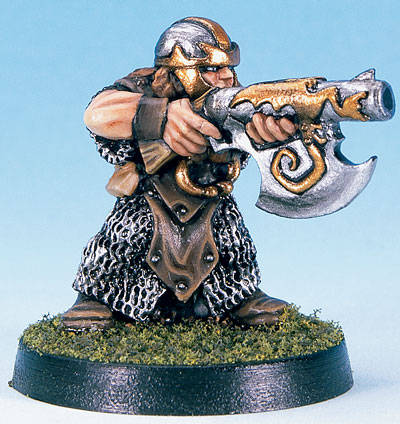
Drybrushing
is the best way to paint chainmail. If the paint starts to "fill
in" any of the detail, apply a dark wash to return definition.
|
 |
Drybrushing is the easiest and quickest way to produce highlighting effects on textured surfaces. As the name suggests, most of the paint is removed from the brush so that the bristles are fairly dry -- you then gently flick the tip of the brush across the textured surface so that the paint adheres to only the most prominent areas. Drybrushing is a pretty easy technique to learn, and once you've mastered it you can produce some great and rapid results. There are a few things that you will need to watch for, and we'll go over those in a minute, but first I'll take you through the technique stage by stage. For this example, imagine you are painting a chainmail shirt on a dwarf. Chainmail (and some other types of armor) provide the ideal surface for drybrushing: heavily defined texture.
|
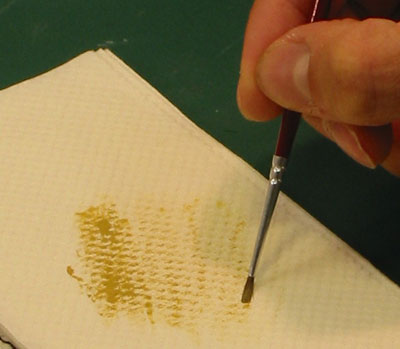
Wipe
the bristles of your brush across a paper towel to remove nearly
all the liquid paint.
|
 |
The whole aim of the process is to build up the highlights gradually to produce a subtle highlighting effect. Drybrushing can be applied to most textured surfaces on a miniature -- just follow the example above but substitute appropriate colors. So if you are painting a gnoll's fur, base coat with a deep brown and drybrush with progressively lighter tones.
|
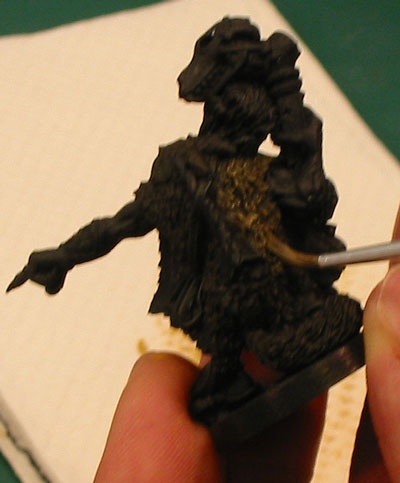
The
drybrushing process builds up highlights gradually. The tip of the
bristles are gently flicked across the surface of the miniature
so that raised detail picks up the paint.
|
 |
Several factors can affect the finished result. Most important, you need to have the right amount of paint left on the brush. As with so many other areas of miniature painting, developing a feel for the "right amount" really comes down to practice and patience. Also, drybrushing can be a fairly messy process -- it's quite hard to keep the brush off surrounding areas. It's best to do all the drybrushing on a miniature first so as not to spoil areas you've already painted.
Washing
Washing is in many ways the other side of drybrushing. Drybrushing is used to highlight; washing is used to shade. In drybrushing the paint is practically dry; in washing it is extremely liquid. Washing is an incredibly handy technique, and has more uses than drybrushing.
To wash an area, thin the paint considerably -- so much so that when it is applied to a heavily textured surface it runs off the raised areas and into the recesses to provide shading. It really is as easy as that! Don't completely flood the miniature with paint; if you wash too much color over an area, you'll just fill in the detail and end up with a mess. Of course, the more you practice, the better you'll become at the technique. As with drybrushing, it's something you need to perfect through practice.
Faces are one of the most effective places you can add a wash. Base coat with a fairly light flesh tone first, and be sure to let it dry thoroughly before proceeding. Then mix up a red-brown wash color (ideally with artist's inks -- see below) and apply it to the whole area. The color shouldn't be too strong, so thin it out with water before applying. The thinner color will run into the recesses and you'll be amazed at how well the features emerge. The same mix can be applied to all of the skin regions and works particularly well on areas such as hands.
|
The
fur on this abyssal ravager first received a deep brown wash over
a light base color to pick out the detail. Then highlights were
drybrushed on.
|
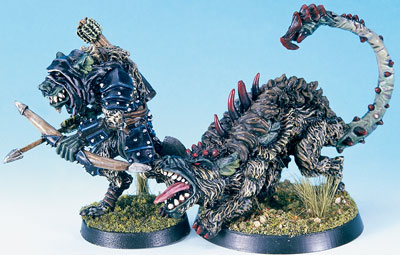 |
Washing and drybrushing go together really well, as they both enhance heavily textured surfaces. The two techniques can be combined, for example, to paint the fur on a gnoll:
|
Artist's Inks The main trouble with using acrylic paint for washing is that the more you thin the paint, the weaker the color becomes -- creating patchy results. Artist's inks already have a thin consistency and contain quite intense pigments, so they are absolutely ideal for washing. The colors are really strong if used neat, but can be further thinned to lessen their intensity. Make sure you use ink that is watertight when dry or you will rewet it with any additional colors you use. Artist's inks are fairly pricey, but the colors are so strong that they last for ages -- I'm still using inks I bought ten years ago. You can also combine inks with paints to achieve all sorts of effects. I like to add a little paint to a wash color to give it some body and stop the wash from forming into puddles so readily. |
![]()
Now,
what are you going to paint?
Check out the
latest selection of D&D miniatures in our
online store!